Leash Training
Prong Collar Sizing: How to Get the Perfect Fit for Your Dog
A properly fitted prong collar is the difference between a tool that communicates clearly and one that just hangs around your dog's neck causing confusion or discomfort. Getting prong collar sizing right is what lets the collar do its real job, which is giving your dog a gentle, consistent signal down the leash. This guide walks you through how to measure your dog's neck, choose the right wire gauge, adjust the collar link by link, and sidestep the mistakes I see dog owners make most often when they fit this training tool for the first time.
What You'll Learn
- How to measure your dog's neck the right way
- How to choose the correct wire gauge and link size for your dog
- How to adjust the collar link-by-link for a snug, even fit
- The signs a prong collar is too tight or too loose
- Live ring vs. dead ring :where to clip the leash, and why
- How prong sizing differs from flat collars, chain collars, and harnesses
Quick Start: How to Size a Prong Collar in 5 Minutes
Correct prong collar sizing comes down to two things: your dog's neck size where the collar actually sits, high on the neck and just behind the ears, and your dog's weight, which points you toward the right wire gauge. You'll want both numbers in hand before you buy anything, because prong collar sizes vary with both.
LOOSE LEASH WALKING COURSE
Want to Use the Prong the Right Way?
A prong only works when it's used right. Our leash training course teaches proper prong use in 9 simple exercises.
The process itself takes about five minutes. Start by measuring your dog's upper neck circumference in inches while they're standing naturally, then add roughly two inches to account for the thickness of the prong links, and pick the starter collar closest to that total. From there you place the collar high on the neck and add or remove individual prong links until it sits snug but never straining. A properly fit prong collar sits behind the ears and under the jawline, lies evenly around the neck with no slack, and stays put instead of sliding down toward the shoulders the way a flat collar or chain collar would. If you land between sizes, size down to the smaller base collar and add extra links, rather than buying a long collar and stripping out a pile of them, which distorts the collar's shape over time.
Understanding Prong Collars and How They Work
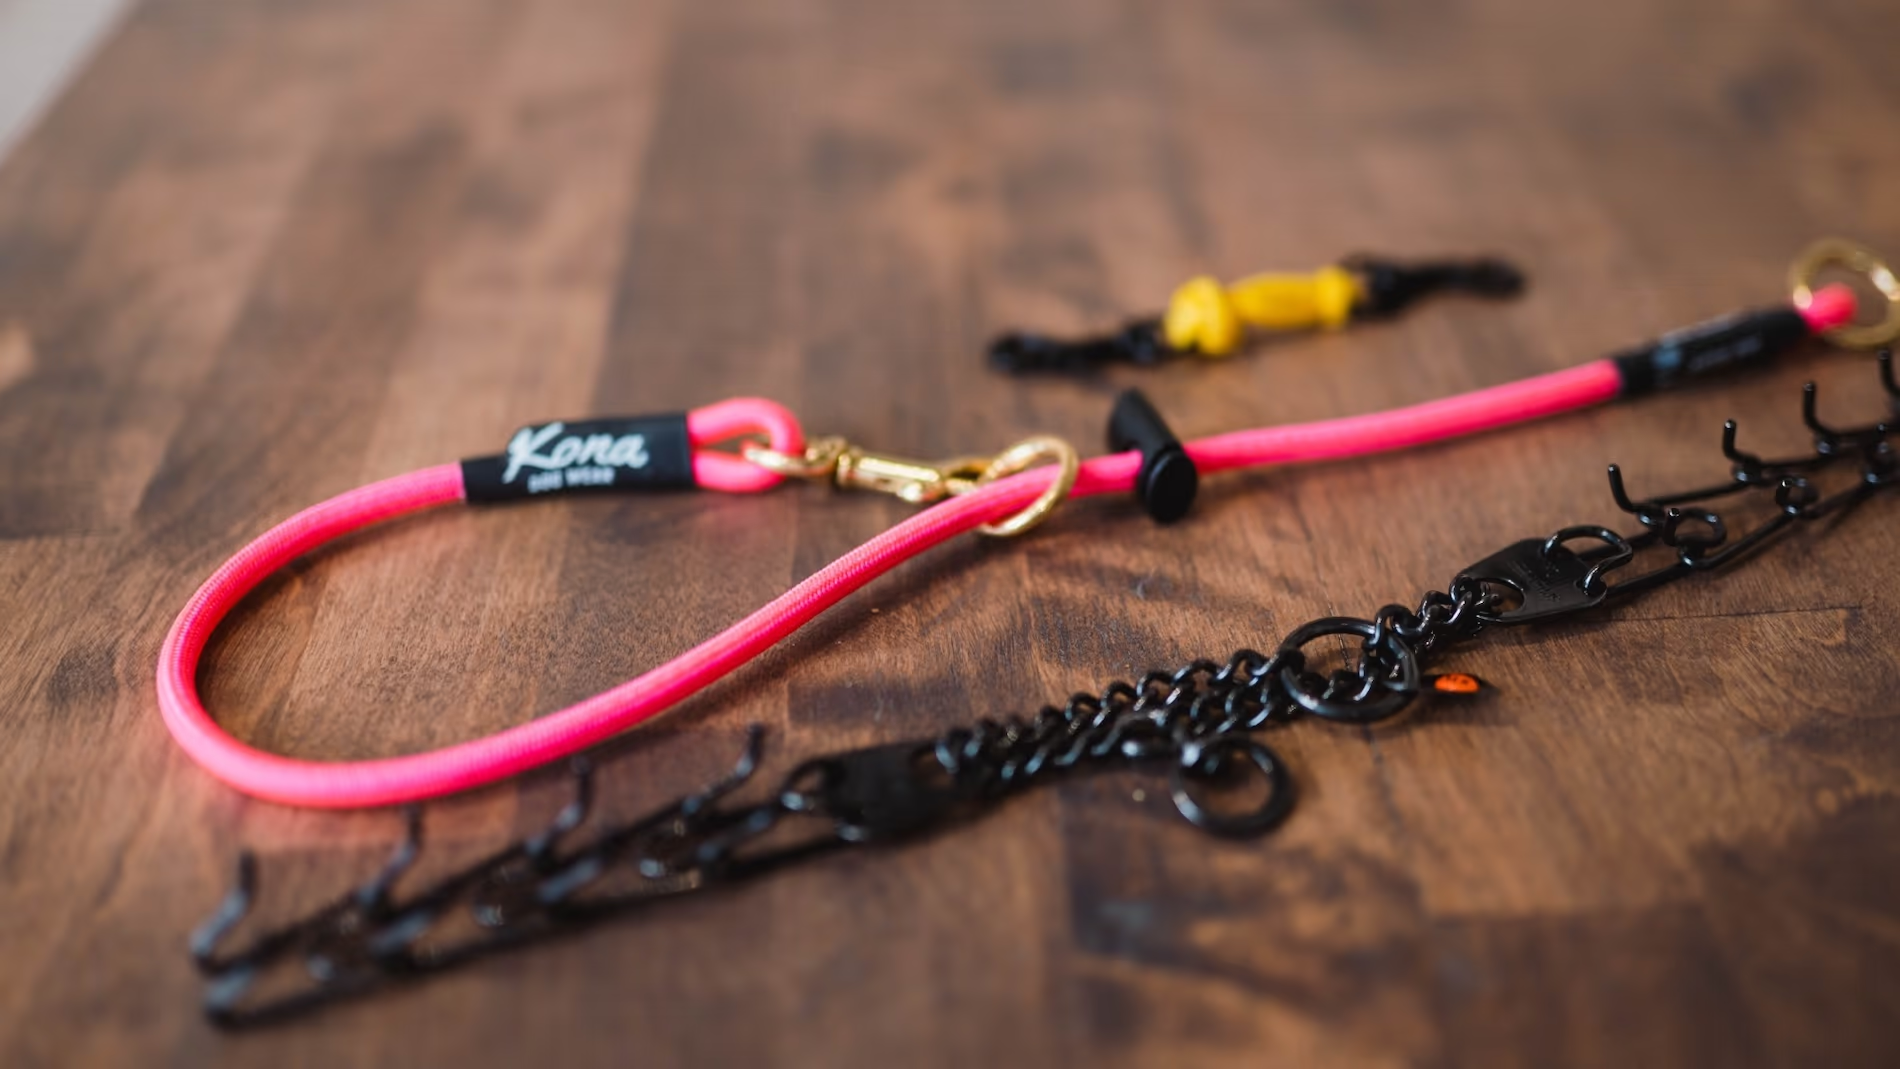
A prong collar is a training tool made of interlocking metal links, each with a blunted, inward-facing prong, built to spread momentary pressure evenly all the way around the dog's neck. When there's tension on the leash the prongs pinch gently and briefly, then release completely the instant the leash goes slack again. That gives your dog a quick, clear cue rather than the continuous choking a dog gets from pulling into other collars. Clarity is the whole point of the tool. It isn't a punishment device and it isn't a magic fix for pulling, it's a way to communicate down the leash without nagging, yanking, or playing tug-of-war the whole way home.
One thing worth saying up front is that quality matters enormously here. A precisely machined prong with properly smoothed and rounded tips sits comfortably and behaves predictably, where the cheap knockoffs flooding online marketplaces tend to have rough tips, inconsistent link sizes, and links that stick or pop apart at the worst possible moment. When you're putting a tool on your dog's neck, this really isn't the place to save twenty dollars.
The contrast with other collar styles is worth understanding too. A flat collar rests lower on the dog's neck and is perfect for ID tags and everyday walking, but it concentrates all the force in one spot when a dog pulls and doesn't give you the same clear communication during obedience work. A chain collar tightens continuously as tension builds, bearing down on the throat with no built-in limit, which is why choke chains carry a higher risk of neck and tracheal injuries than a prong does. Because a prong's interlocking links can only close so far, they distribute that pressure across many points instead of a single line on the trachea, and for a dog who pulls, that actually takes strain off the throat rather than adding to it.
Modern prong collars are typically made from chrome plated steel or stainless steel, with rounded tips that resist rust and rough edges. Keep in mind that this is a training tool, not a permanent everyday collar. It needs a careful introduction, your dog needs to understand what leash pressure means before you ever clip it on, and it should come off when you're not actively training.
Step 1: Measuring Your Dog's Neck the Correct Way
Measure high on the dog's neck, right behind the ears and under the jaw, because that's where the collar sits during training. Skip the base of the neck where a flat collar usually rides, since that spot is lower and wider and will hand you a collar that's far too loose once you move it up to the correct position. A soft cloth tape measure works best, though you can also loop a piece of string around the neck and lay it against a ruler. Keep your dog standing naturally rather than sitting or curled up, pull the tape snug but not tight, and record the number, measuring twice to be sure if your dog carries a thick or double coat.
Once you have that number, add two inches to arrive at your collar size. Those two inches account for the thickness of the prong links and keep the collar from fitting tightly before any correction is ever applied. And because dogs change with age, diet, and conditioning, it's worth rechecking every few months, especially with an adolescent whose head and neck dimensions are still shifting week to week.
Step 2: Choosing the Right Wire Gauge and Link Size
The wire gauge refers to the thickness of the prong wire in millimeters, and it shapes both how sturdy the collar is and how the correction feels against your dog's neck. Most sizing charts will tell you to match the gauge to your dog's weight, and there's a place for that, but here's what I actually recommend after fitting a lot of dogs.
FREE BUYING GUIDE
Not Sure Which Prong Collar to Buy?
Brand, wire gauge, and link size all change how well the collar works. Our free Prong Collar Buying Guide shows you exactly what to look for.
For most dogs, even large dogs up to around 70 pounds, I reach for the 2.25 mm size. It surprises people that I'll put this on bigger dogs, and the reason is simple: the smaller links let you dial in a genuinely precise fit, because each link you add or remove is a smaller increment. Remember that your dog shouldn't be leaning into the prong with all their weight anyway. It's a gentle tool for leash communication, not a device for physically holding a dog back, so you don't need a heavy gauge to make it work. If your dog has a larger neck, you simply buy extra links and size up, and that 2.25 mm collar keeps fitting beautifully.
I save the heavier 3.0 mm links for very large breeds like Great Danes and Mastiffs, or for dogs with really thick double coats where the bigger links help the prongs stay in contact instead of getting lost in the fur. For small dogs under about 20 pounds there's a micro prong option.
Herm Sprenger has also just launched a new 3.0 mm "short version," which is a great option for larger dogs, since it gives you the sturdier link with shorter spacing so you can still dial in a genuinely good fit rather than settling for close enough.
If you'd rather see it mapped out by weight as a starting reference, here's how the common gauges break down:
| Wire Gauge | Best For | Notes | | Micro prong | Small dogs under ~20 lbs | Finer links for delicate necks | | 2.25 mm | Most dogs, up to ~70 lbs | My default; add extra links to size up | | 3.0 mm "short version" | Larger dogs needing a sturdier link or double coat dogs | Newer Herm Sprenger size; shorter spacing dials in a better fit | | 3.0 mm | Very large breeds and thick double coats | Bigger links keep contact through heavy fur |
As a real-world example, Herm Sprenger maps their 2.25 mm collar to dogs up to 66 pounds with necks up to 14 inches, which is exactly why it covers the vast majority of dogs so well. Brand matters here as much as gauge, and Herm Sprenger is the only one I recommend, because the tips are properly finished, the links pull apart and click back cleanly every time, and the steel holds up for years. Whichever gauge you land on, staying inside the manufacturer's weight guidelines is what keeps the collar delivering calibrated feedback instead of behaving like a blunt instrument.
Step 3: Adjusting the Collar for a Perfect Fit
Prong collars are built to be adjusted by adding or removing links, and they should never be slipped over the dog's head the way a chain collar is. Most quality models open and close around the neck with a quick-release clip or a snap assembly, and if you have arthritis or limited hand strength, a Herm Sprenger with a ClicLock buckle makes that far easier than the traditional pinch-and-connect closure.
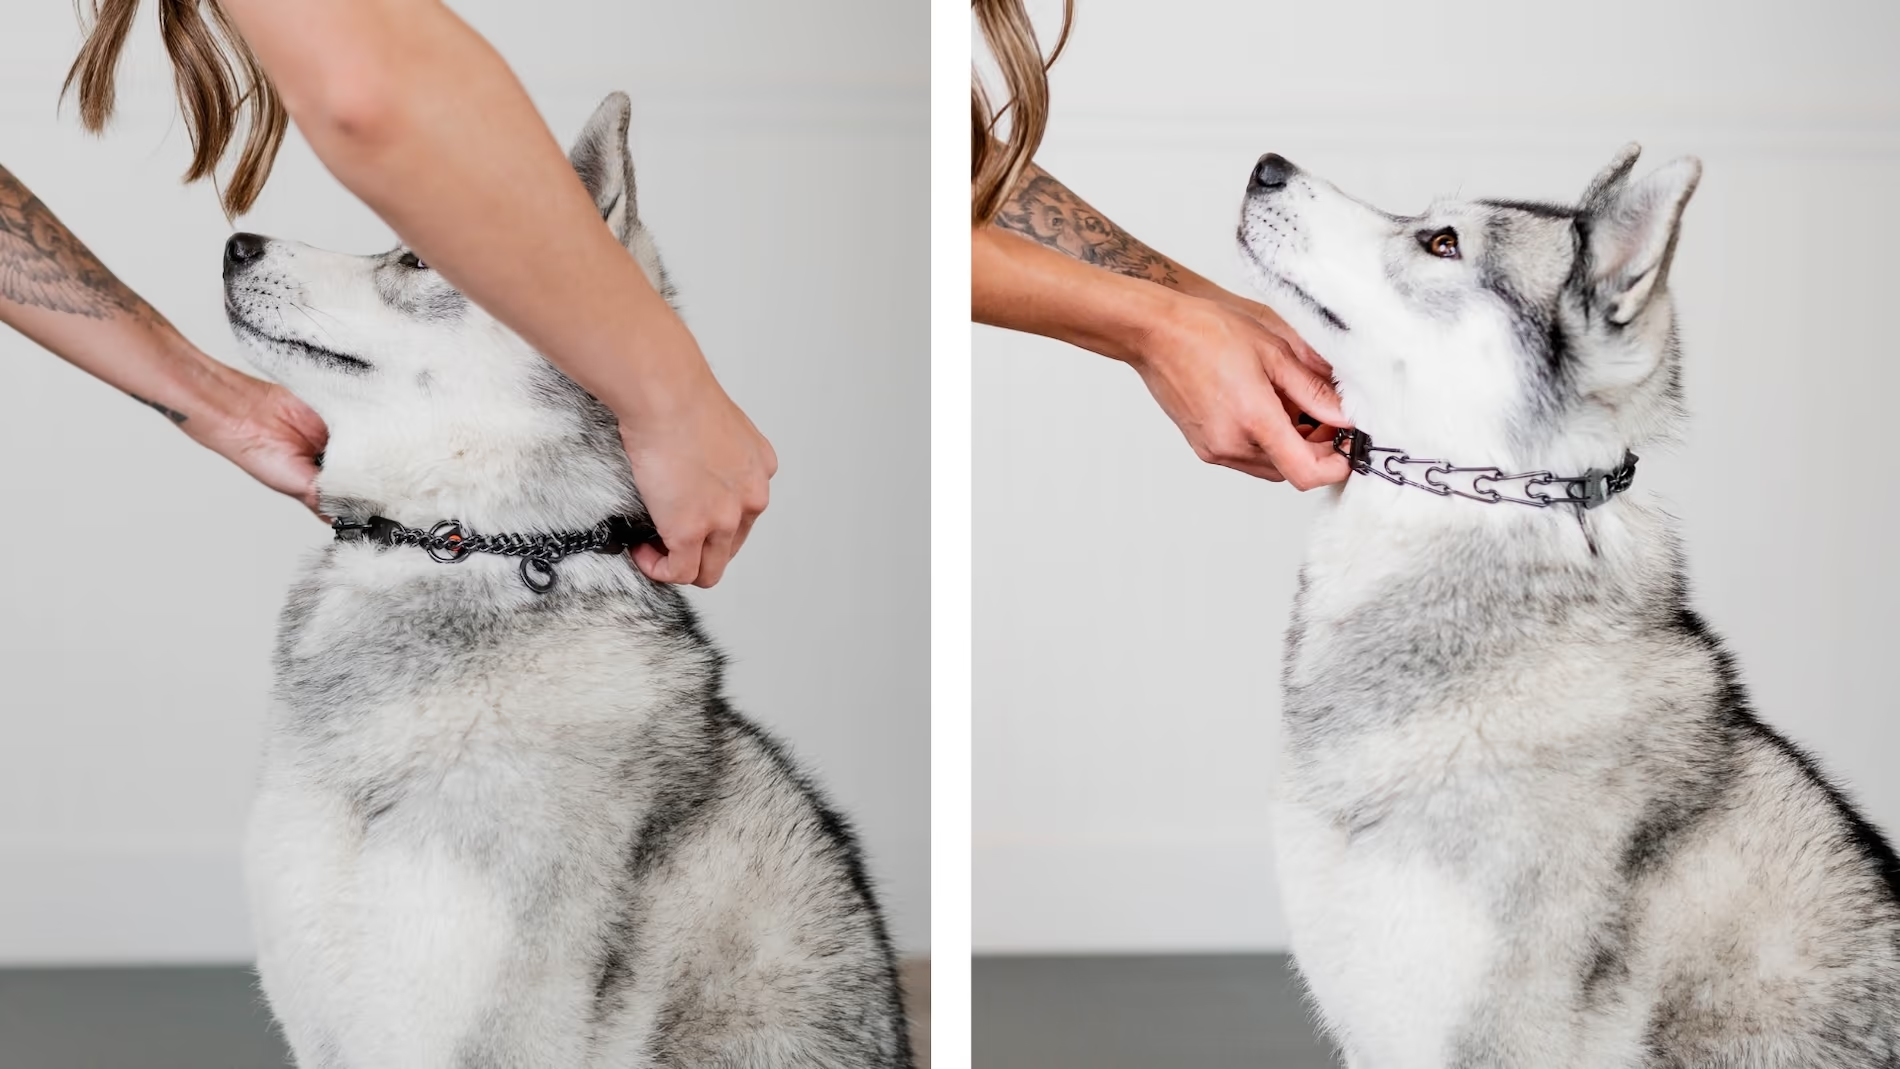
To open a link, pinch the two ends of a single link together and twist or pull them apart with firm, steady pressure, then reverse the motion until it clicks securely back into place. Start with the base collar placed high on the neck in that correct spot behind the ears, and take out links one at a time until it sits snug, which is the standard way to dial in the fit.
One detail that makes fitting much easier is watching the assembly chain, the run of regular chain links that lets the collar tighten and loosen under leash pressure. That chain needs a little play in it to do its job. If it's completely maxed out with no give left to tighten or loosen, your prong is too tight and you should add a link back in. Beyond that, check the fit by eye and by hand: the collar shouldn't rotate freely all the way around, shouldn't slide down toward the shoulders, and the leash ring should stay positioned up under the chin. You're aiming to fit just one finger between a prong and the skin, and if it's still too loose after you've removed several links, exchange it for the next smaller starting size rather than over-stripping links and leaving the collar oddly shaped, which compromises both fit and safety.
Heads up, and this trips up almost everyone: a properly fitted prong is going to look tighter than you expect. Most owners assume their dog needs more room than they actually do, and a loose collar that slides to the base of the neck loses all of its communication value. Snug and high is the goal.
Fit Check: Signs Your Dog's Prong Collar Is Too Tight or Too Loose
Even the best prong collar causes problems when the sizing is off, leaving you with a tool that's either uncomfortable, ineffective, or both. Here's how to read the fit.
Too tight: You can't slip even one finger beneath a prong. The skin shows visible pinching or bunching. Your dog wheezes, coughs, or looks uncomfortable under light leash pressure, or red indents linger on the neck minutes after the collar comes off. Another tell is the assembly chain stretched to its absolute limit with no room left to move. Any of these means it needs to come loose a link right away.
Too loose: The collar slides down the neck toward the shoulders, the links hang with obvious slack, and the leash ring rotates freely to the back between the shoulders. Left loose enough, a dog can even back out of it entirely. A collar this loose can't work during training, because the prongs never make consistent enough contact to deliver a clear cue. This, for what it's worth, is the single most common mistake I see.
Just right: The collar sits snugly behind the ears and stays mostly in position when your dog moves, riding low enough not to press into the ears while never dropping to the base of the neck, and leaving no lasting marks after short, calm sessions.
Live Ring vs. Dead Ring: Where to Attach the Leash
Most prong collars give you two rings, a live ring and a dead ring, and which one you clip the leash to changes how the collar behaves during a correction.
The live ring moves freely and takes up slack quickly. It's the ring experienced handlers tend to default to with strong, less sensitive dogs, or for obedience work with large dogs that need clear, decisive feedback. The dead ring allows only limited movement and a gentler, more gradual tightening, which makes it the better starting point for sensitive dogs or for dog owners who are new to prong collar training and want to reduce the risk of over-correcting. If you're introducing this tool into your routine and aren't sure which ring suits your dog, start with the dead ring and work from there.
On either ring, a correctly sized collar should tighten briefly during a leash pressure and release fully the moment tension drops. What you don't want is two leashes under active tension on both rings at once, since that creates constant, uneven pressure the collar was never designed for. A slack safety backup is also something I strongly recommend: this clips from your prong to your dog's flat collar so that if the prong ever fails (comes apart), you will still be attached to your dog. If you're genuinely unsure which ring fits your dog's behavior and your own handling experience, feel free to reach out for tips.
LOOSE LEASH WALKING COURSE
Fitted It, Now What?
A good fit is only the beginning. Our leash training course shows you how to use the prong right, so pulling becomes calm, connected walks.

Prong Collar Sizing vs. Flat Collars, Chain Collars, and Harnesses
Sizing rules don't carry over from one tool to the next, and a prong actually demands more precision than a flat collar or chain collar because of where it sits and how it works.
A flat collar is usually sized for the middle or base of the neck with generous slack, often two or more fingers, for all-day comfort and ID tags, so you can't borrow your dog's flat collar size to size a prong.
A chain collar has to be long enough to slide over the widest part of the dog's head, which typically means adding two to four inches beyond the neck circumference, whereas a prong opens and closes around the neck through its snap or link assembly and never goes over the head at all, so head size is simply irrelevant to prong collar sizing.
A harness is a different animal again, sized primarily by chest girth and built to spread force across the chest and shoulders rather than communicate through targeted neck pressure, which means harness measurements tell you nothing about prong sizing.
Each of these tools carries its own measurement approach and its own use, and mixing the methods is one of the fastest ways dog owners end up with gear that's either ineffective or unsafe.
Age, Breed, and Coat: Adapting Prong Collar Sizing to Your Dog
The ideal fit is shaped by more than neck size and weight, since your dog's age, breed, body shape, and coat all have a say in it. An adolescent dog changes neck and head dimensions fast, so you'll be resizing or replacing the collar often and checking the fit every couple of weeks through growth spurts. Hold off on regular prong use until your puppy is at least six months old, and many trainers wait a little longer still, into the seven-to-nine-month range.
For large, strong breeds like German Shepherds, Rottweilers, and Pyrenees, measure carefully high on the neck and lean toward the sturdier 3.0 mm links if you're working through a heavy coat, since the prong earns its keep with powerful dogs precisely when the hardware and fit are matched to the animal. Brachycephalic breeds, the short-nosed dogs with compressed airways, are the exception where I'd use extreme caution or reach for an alternative altogether, along with any dog that has a medical condition affecting the neck or trachea.
Coat plays a quieter but real role. On thick-coated or long-haired dogs, part the fur when you fit the collar so the prongs meet skin evenly instead of floating on compressed hair, and expect to add a link when winter bulks up the coat and remove one after a summer groom. With sensitive or small breeds, choose finer gauges, start on the dead ring, keep sessions short, and check for skin irritation after every walk. The goal throughout is control through clarity rather than force, and the collar can only give you that when it's adjusted for the individual dog standing in front of you.
Safety, Maintenance, and When to Reevaluate Sizing
Even a perfectly fit prong needs regular eyes on it. Inspect it every week for bent prongs, stretched or distorted links, and worn connection points, and watch the chrome plated steel for any chips or flaking, since damaged plating exposes bare metal that can rust and irritate the skin. Keep the collar off during unsupervised time, never crate a dog wearing one, and don't stack it under a second collar, because both create snagging hazards or sustained pressure the tool was never built for. A prong is for active training, not for permanent everyday wear.
Plan to revisit the sizing whenever your dog gains or loses real weight, builds muscle through sport or exercise, or starts showing new unwanted behavior around the collar, whether that's scratching, rubbing, or resisting having it put on, and remember that seasonal coat changes in adult dogs can quietly shift a fit you thought was dialed in.
The end goal is always to work your way out of the tool. As your dog learns loose-leash walking, settles into reliable obedience, and starts responding to your cues, you can gradually move to a well-fit slip lead, flat collar, or harness for everyday walks. A prong collar is a training instrument, and the reward for using it correctly is a dog who no longer needs it, one you can walk on nothing more than clear communication and mutual trust.